

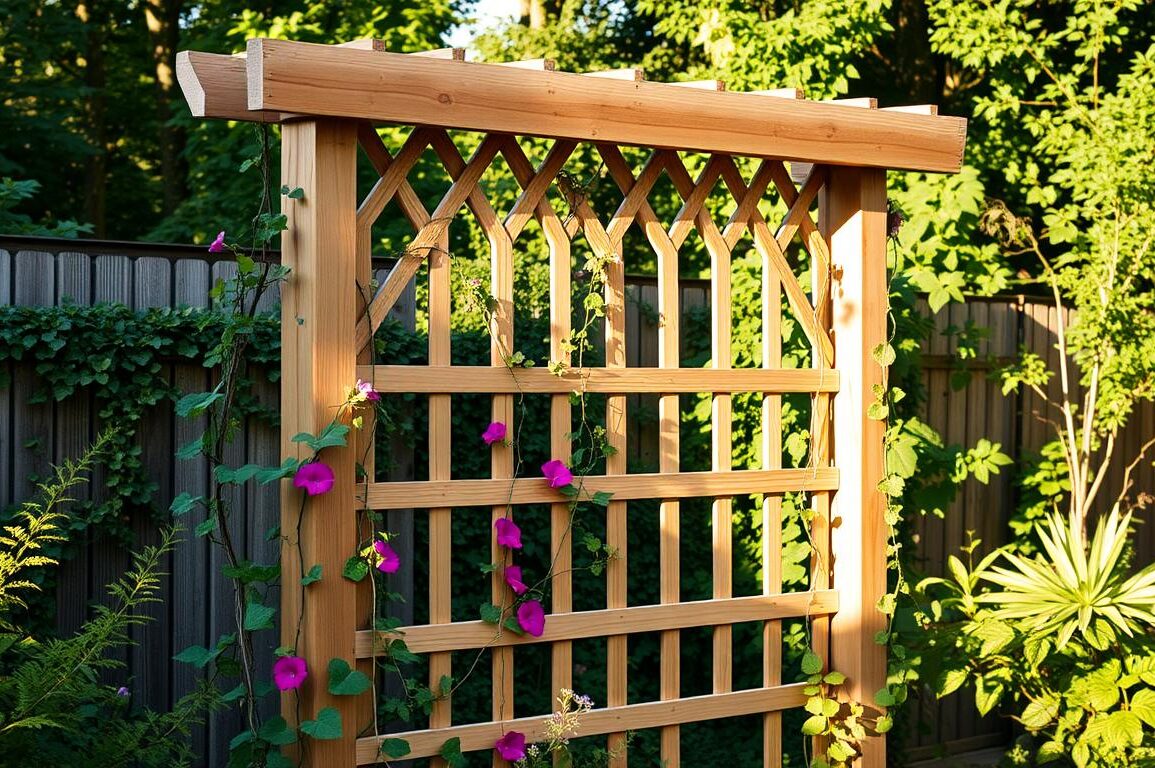
Growing plants vertically is a smart way to save space while adding beauty to your outdoor area. A sturdy structure helps climbing vegetables like beans and cucumbers thrive while keeping your planting area neat.
Research from the University of Minnesota Extension shows that pairing certain plants together improves growth. A well-built support system not only boosts harvests but also enhances your landscape’s visual appeal.
With basic tools and materials, you can create a functional and decorative piece for your growing space. Let’s explore how simple it is to construct one for your favorite vines and veggies.
Why Build a DIY Garden Trellis?
Vertical growing structures unlock new possibilities for small-space gardeners. They let climbing plants like pole beans and peas reach their full potential while keeping your vegetable garden tidy.
Sturdy supports do more than save space. They prevent soil-borne diseases by keeping vines off the ground. Research from the University of Minnesota Extension shows companion plants like nasturtiums can also shield vegetables from pests.
Flowering vines like clematis add beauty while practical designs boost yields. The shade underneath creates microclimates for delicate plants. Plus, structured layouts turn functional pieces into eye-catching features.
Whether you’re growing food or flowers, a well-built frame helps every plant thrive. It’s a simple upgrade with big rewards for your outdoor space.
Materials and Tools You’ll Need
A well-planned design starts with quality supplies and proper tools. Choosing rot-resistant lumber and durable hardware ensures your structure withstands weather and heavy vines.

Essential Supplies
Cedar posts resist rot better than pine, but both work for this project. Cut lists include:
- 5 pieces of ½” x 1″ lumber (60″ length)
- 2 pieces (35.25″ length) for crossbars
- Galvanized livestock panels as a rust-proof alternative
Use non-toxic exterior paint with low VOC levels. Lighter colors reflect heat and prevent warping.
Tools
A table saw speeds up cuts, but a hand saw works for smaller projects. Safety gear like dust masks and glasses protects you during construction.
- Nailer vs. hammer: Nailers reduce wood splitting but require compressors.
- Drill with screwdriver bits for sturdy joints.
- Level to keep posts straight on uneven ground.
Simplify your project by pre-measuring all pieces. This saves time and improves accuracy.
DIY Garden Trellis in 5 Easy Steps
Follow these simple techniques to craft a durable structure for vines and vegetables. Each step ensures stability and longevity, even under heavy plant growth.
Prepare Your Materials
Start by cutting lumber to the specified lengths. Use a miter saw for angled edges on reinforcement pieces. Measure twice to avoid waste.
- Mark 35.25-inch pieces for crossbars with chalk.
- Sand rough ends to prevent splinters.
Design the Layout
Create a fan shape with 4.25-inch spacing at the base and 8.75-inch gaps at the top. Chalk lines help maintain symmetry.
Space horizontal struts evenly—11 inches apart—for optimal plant support. Check alignment with a level.
Assemble the Frame
Secure joints with galvanized screws to prevent splitting. Pre-drill holes for cleaner results. Attach side pieces first, then add crossbars.

Strengthen the Structure
Reinforce corners with triangular braces. For A-frames, add 35.25-inch supports at a 45-degree angle. Bamboo poles (6 feet) work as lightweight alternatives.
- Pro tip: Use a nailer for faster assembly without splits.
Apply Protective Finishes
Paint with low-VOC exterior paint for weather resistance. Light colors reflect heat and reduce warping. Allow 24 hours between coats.
For natural looks, use linseed oil on untreated wood. Reapply yearly for lasting protection.
Choosing the Perfect Spot for Your Trellis
Finding the right location ensures your plants get the sunlight and support they need. Fruiting varieties like tomatoes and cucumbers require full sun—at least 6–8 hours daily. Observe your yard’s sun path to pick the ideal place.

Wind exposure matters too. Heavy vines can strain weak posts, so avoid open areas with strong gusts. Install T-posts 18–24 inches deep for stability, especially in loose soil.
Consider these factors for optimal results:
- Spacing: Leave 4 feet between structures for airflow and access.
- Companion plants: Basil or marigolds near the base deter pests naturally.
- Fasteners: Galvanized wire outlasts zip-ties for permanent setups.
Temporary designs work for seasonal crops, while anchored posts suit perennial vines. Either way, proper spacing and sunlight boost vegetable yields and keep plants healthy.
Maintaining Your Garden Trellis
Regular care extends the life of your structure while keeping vines healthy. Seasonal upkeep prevents wear and ensures sturdy support for years. Follow these simple routines to stay ahead of damage.
Inspect wooden frames monthly for pests like termites. Tap posts to check for hollow sounds—a sign of rot. Treat minor issues early to avoid costly repairs.
For Split-Second Morning Glory (Baker Creek Seeds), prune spent blooms to encourage new flowers. Train stems gently with soft ties to avoid breakage.
Seasonal Maintenance Tasks
| Season | Task | Tip |
|---|---|---|
| Spring | Repaint chipped areas | Use light colors to reflect heat |
| Summer | Check vine weight | Add extra supports if sagging |
| Fall | Clean debris | Prevents mold over winter |
| Winter | Store removable parts | Keep in dry shed or garage |
After storms, test structural integrity. Tighten loose screws and replace cracked wood. For cold climates, choose hardy flowering vines like clematis for multi-season use.
- Training vines: Weave stems horizontally for fuller coverage.
- End-of-season cleanup: Remove dead leaves to deter disease.
- Storage: Disassemble portable designs to prevent snow damage.
With these steps, your frame stays in top shape year-round. Healthy vines mean more blooms and harvests with less work.
Conclusion
Custom structures add both function and charm to any growing space. Whether you choose a simple frame or an arched entryway, building your own costs less than store-bought options. Plus, it lets you tailor the design to fit your needs.
Share your project with a friend or online community for inspiration. For those ready to level up, try curved supports or mix materials like bamboo and metal. Organic gardening supplies from local nurseries ensure eco-friendly results.
Start small with ground-level plants, then expand as confidence grows. Remember, even basic setups can yield impressive harvests. Happy building!